This article is an updated version of one previously published on Medium.
To demonstrate the development cycle of Flutter, this “guide” shows the steps required to build a dice roller app.
What are we building? 
Our app, after completion, would somewhat look like the following:
As demonstrated, it consists of the following controls:
- A control to roll the dice(display a random image of a dice face). The image of the dice face would depend upon a random number between 1 and 6.
- A control to “reset” the dice(display nothing/a white space image). It would display only if the random number is reset to zero.
- For the sake of completion, a control to simply count up the faces of the dice, up to 6. The image of the dice would change accordingly.
Let’s get started.
Building the dice roller 
Step 0: Making sense of the UI 
Taking a look at the UI, we see the following elements to be included:
- An AppBar
- An Image
- 3 Buttons
Additionally, a SnackBar has to be invoked when we press the “Roll” button.
Grouping the elements which display in the “background” of the app as the “body” of the app, we get the following arrangement:
Now, an element in Flutter that takes in an AppBar and a Body is a Scaffold, thus we can continue the arrangement of the elements as:
Since we are building an application that would contain these elements, wrap these elements under a MaterialApp…
…and we have the widget tree of the application.
Since Flutter doesn’t have a separate language to define the layout, thinking instead about the widget tree is the first thing a Flutter developer would probably do when building an app. Experienced developers would typically break layouts into boxes and go straight to coding once getting a hang of this.
Now as we have the widget tree figured out, let’s get to actual coding.
Step 1: Implementing the widget tree 
Here’s (more or less) the widget tree above translated into Flutter (along with some more code):
 1import 'package:flutter/material.dart';
 2
 3void main() {
 4  runApp(const App());
 5}
 6
 7class App extends StatelessWidget {
 8  const App({super.key});
 9
10  @override
11  Widget build(BuildContext context) {
12    return MaterialApp(
13      title: 'Dice Roller',
14      home: Scaffold(
15        appBar: AppBar(),
16        body: const Body(),
17      ),
18    );
19  }
20}
The import statement includes all the elements(said as widgets from here) to
be used in the app as the material.dart package, which contains the widgets
implementing the Material Design system. To build an app following
Apple’s Human Interface guidelines, especially for iOS and macOS,
import cupertino.dart.
Next up, it uses the main() function, which is the entry point of execution of
any Dart program. This function calls another function runApp() which, as
the name suggests, runs an “app”, which is the argument passed to the function;
the App() object.
The const keyword denotes that the App() object passed to runApp() is a
compile-time constant. Specifying widgets as const is a recommended
convention that helps with performance of the app.
App() is nothing but an object of a simple Dart class, which behaves as a
widget by inheriting from a special class StatelessWidget. These widgets
do not have a state, which would imply that they never change their
configuration in the app, be it through appearance or functionality.
The constructor of App defines an optional named parameter named key
which it passes to its superclass. Defining this parameter is also recommended,
even if we don’t use it in this case.
The App class overrides build(), which returns the widgets which are under
the current widget in the widget tree(in other words, these widgets define the
composition of the App() widget), to be displayed on the screen. The
BuildContext object it takes denotes its location in the widget tree.
Here, the function returns a MaterialApp, whose argument to the home
parameter is the widget we wish to see upon launch.
The Scaffold widget provides a template for building any screen of an app
following the Material Guidelines. It provides various placeholders, of which,
we use two, appBar with an AppBar and body.
Trying to run the app now would result in an error, as flutter does not have a
widget named Body.
Step 2: Defining the Body widget
 1class Body extends StatefulWidget {
 2  const Body({super.key});
 3
 4  @override
 5  State<Body> createState() {
 6    return _BodyState();
 7  }
 8}
 9
10class _BodyState extends State<Body> {
11  @override
12  Widget build(BuildContext context) {
13    //TODO: Define the body
14  }
15}
Body is defined as a subclass of StatefulWidget, which implies that
this widget has a state, upon which the appearance or behaviour of the
widget depends. The state may change on any point of time during the
lifecycle of the app, for instance due to a user interaction or the completion
of a task. The state of the widget is defined as another class; here as
_BodyState, whose structure looks very similar to the definition of any
StatelessWidget. An object of _BodyState is returned in the createState()
function of the Body class.
One more thing to note here. Putting an underscore “_” in front of any
identifier in Dart makes it private for the file (or library), which means
that it is inaccessible outside the file. As the state of any
StatefulWidget is only useful for the widget itself, making it private is
generally a good idea.
Step 3: Building the body of the app 
Referring back to Step 0, we need to implement an Image, and 3 buttons for the body, arranged vertically.
In Flutter, a widget that vertically lays widgets is Column. It takes a
list of widgets to be placed vertically one under the other as its children and
aligns them according to some arguments.
In our case, Column could be used as:
 1class _BodyState extends State<Body>{
 2  @override
 3  Widget build(BuildContext context){
 4    return const Column(
 5      children: <Widget>[
 6        // TODO: Define children
 7      ],
 8    );
 9  }
10}
Let us try running the app now.
We wouldn’t have to wait this long next time for applying changes.
Step 4: Defining the functions to be invoked on button press 
To use buttons, we need to specify what we want the app to do when the buttons are pressed.
The three buttons of our app are supposed to do these three things:
- Provide a random number between 1 and 6.
- Reset the current number to 0.
- Increment the current number up to 6.
Since this “current number”, which is the face value of the dice, is subject to
change upon user interaction, we can consider it to represent the “state” of the
app. Since a StatefulWidget is already being used here, we can define a state
variable “_dice” as a member of the state class to hold the current number,
and provide its initial value as “0” signifying that the dice hasn’t been
rolled yet.
1class _BodyState extends State<Body>{
2  int _dice = 0;
3  @override
4  Widget build(BuildContext context){
5  ...
Now import the following library:
1import 'dart:math' as math;
This library has the usual mathematical functions and constants, along
with a class to create a random number generator. The math alias is used
here to simplify some code to be written later.
Let us define the random number generator:
1var r = math.Random(42);
The math.Random() function takes an integer as the seed to generate numbers.
Now we define the required functions for the controls as members of
_BodyState:
 1void _rollDice(){
 2  setState((){
 3    _dice = r.nextInt(6) + 1;
 4  });
 5}
 6
 7void _countUp(){
 8  setState((){
 9    _dice = _dice < 6 ? _dice + 1 : _dice;
10  });
11}
12
13void _resetDice(){
14  setState((){
15    _dice = 0;
16  });
17}
The nextInt() method of the Random object gives a number from 0 up to
the argument (exclusive). So to get a number between 1 and 6, we get a number
from 0 and 5 and add 1.
Each of these functions call the setState() function, which “notifies
the framework of a change in the state”. The change is made in a function
provided as an argument. The widget tree is then rebuilt reflecting the changes.
Changing the state itself without calling setState() will not make the
framework rebuild the tree.
Step 5: Defining the buttons 
For buttons, we use the ElevatedButton widget, which among many, takes
two parameters: child and onPressed. The first parameter is typically used
to display the label, using a Text widget. The latter takes the function
which would be invoked every time the button is pressed.
 1class _BodyState extends State<Body>{
 2  int _dice = 0;
 3  @override
 4  Widget build(BuildContext context){
 5    return Column(
 6      children: <Widget>[
 7        ElevatedButton(
 8          onPressed: _rollDice,
 9          child: const Text('Roll'),
10        ),
11        ElevatedButton(
12          onPressed: _countUp,
13          child: const Text('Count up'),
14        ),
15        ElevatedButton(
16          onPressed: _resetDice,
17          child: const Text('Reset'),
18        ),
19      ],
20    );
21  }
22}
Since functions are treated as first-class objects in Dart, you can pass
functions to the onPressed parameter of each ElevatedButton just like any
other object. But they are not constants, so the Column can’t be declared as
const anymore, but each of the labels of the buttons can.
To hot reload, hit r in the current terminal session of flutter run
Step 6: Importing offline assets 
We have the following images to display the dice faces:

The dice images to be used in the app
To add them the app, let’s create a folder to put them in:
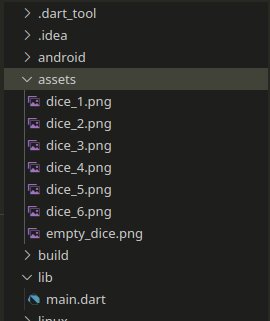
The assets are put in a newly created “assets” folder in the root of the project
To use these images in the app, they need to be “imported”, but not like any library file. Enter…
pubspec.yaml 
This file provides information about various dependencies required to build the app. This includes any offline assets.
By default, there are commented statements as guides to use the assets:

Likewise, with proper indentation, add to pubspec.yaml:
1assets:
2 - assets/dice_1.png
3 - assets/dice_2.png
4 - assets/dice_3.png
5 - assets/dice_4.png
6 - assets/dice_5.png
7 - assets/dice_6.png
8 - assets/empty_dice.png
That’s it! After saving, these assets would be available through their location in the project folder.
Step 7: Using offline assets 
To use images, Flutter provides the Image widget. As in this case the
images are obtained from the bundled assets, we use the Image.asset()
constructor. You can explicitly set the dimensions of the image using the
height and width parameter.
 1class _BodyState extends State<Body>{
 2  int _dice = 0;
 3  @override
 4  Widget build(BuildContext context){
 5    return Column(
 6      children: <Widget>[
 7        Image.asset(
 8          'assets/dice_1.png',
 9          height: 300,
10          width: 300,
11        ),
12        ElevatedButton(
13          onPressed: _rollDice,
14          child: const Text('Roll'),
15        ),
16        ElevatedButton(
17          onPressed: _countUp,
18          child: const Text('Count Up'),
19        ),
20        ElevatedButton(
21          onPressed: _resetDice,
22          child: const Text('Reset'),
23        ),
24      ],
25    );
26  }
27}
Step 8: Changing image on the dice roll 
We define a function that returns the location of the image depending on the
value of _dice:
1String determineImage(int value) {
2  if (value == 0) {
3    return 'assets/empty_dice.png';
4  }
5  return 'assets/dice_$value.png';
6}
We use the naming scheme followed by the assets to our advantage, and use the
“value” of value itself to derive the exact name of asset the app needs to
show by using string interpolation.
Now we use the function in the Image widget:
Since the widget tree is already being rebuilt using setState() in the
onPressed handler of the buttons, any changes will automatically take effect.
Step 9: Implementing the SnackBar 
The snackbar in the app is shown when we press the Roll button. To do that
we modify the _rollDice() function:
 1void _rollDice(){
 2  setState((){
 3    _dice = r.nextInt(6) + 1;
 4  });
 5
 6  ScaffoldMessenger.of(context).showSnackBar(
 7    const SnackBar(
 8      content: Text('Rolling...'),
 9      duration: Duration(milliseconds: 300),
10    )
11  );
12}
The new statement in the function uses the ScaffoldMessenger to
display a SnackBar with the provided label as content and the amount
of time the SnackBar should stay visible on the screen as the duration
parameter.
Now, even if the app generates the same random number, you can be sure that you rolled the dice.
Step 10: Finishing touches 
Our app is mostly done, except
- aligning the image and the buttons, and provide some space between them.
- adding a title to be displayed on the appbar.
- change the default colors!
Going back to the Column widget for vertical alignment:
Passing this argument aligns the children of the Column with the remaining
space evenly divided between them along the main axis(i.e., vertically).
For centering the column horizontally, wrap it with the Center widget.
To make the IDE work for you, hit Ctrl + . in Visual Studio Code or Alt + Return in Intellij IDEA/Android Studio while placing the cursor over
Column and bring up a handy menu to do this(and many more) job with a single
button press!
For the second point, we provide the AppBar a title:
To change the default colors, we use the newly supported Material 3 (also known as “Material You”) design system to generate a complete color scheme for our app with a single seed color:
 1return MaterialApp(
 2  title: 'Dice Roller',
 3  home: Scaffold(
 4    appBar: AppBar(
 5      title: const Text('Dice Roller'),
 6    ),
 7    body: const Body(),
 8  ),
 9  theme: ThemeData(
10    useMaterial3: true,
11    colorSchemeSeed: Colors.red,
12  ),
13);
What did we built 
Click to reveal the complete source code.⌵
  1import 'dart:math' as math;
  2import 'package:flutter/material.dart';
  3
  4var r = math.Random(42);
  5
  6void main() {
  7  runApp(const App());
  8}
  9
 10class App extends StatelessWidget {
 11  const App({super.key});
 12
 13  @override
 14  Widget build(BuildContext context) {
 15    return MaterialApp(
 16      title: 'Dice Roller',
 17      home: Scaffold(
 18        appBar: AppBar(
 19          title: const Text('Dice Roller'),
 20        ),
 21        body: const Body(),
 22      ),
 23      theme: ThemeData(
 24        useMaterial3: true,
 25        colorSchemeSeed: Colors.red,
 26      ),
 27    );
 28  }
 29}
 30
 31class Body extends StatefulWidget {
 32  const Body({super.key});
 33
 34  @override
 35  State<Body> createState() {
 36    return _BodyState();
 37  }
 38}
 39
 40class _BodyState extends State<Body> {
 41  int _dice = 0;
 42  @override
 43  Widget build(BuildContext context) {
 44    return Center(
 45      child: Column(
 46        mainAxisAlignment: MainAxisAlignment.spaceEvenly,
 47        children: <Widget>[
 48          Image.asset(
 49            determineImage(_dice),
 50            height: 300,
 51            width: 300,
 52          ),
 53          ElevatedButton(
 54            onPressed: _rollDice,
 55            child: const Text('Roll'),
 56          ),
 57          ElevatedButton(
 58            onPressed: _countUp,
 59            child: const Text('Count up'),
 60          ),
 61          ElevatedButton(
 62            onPressed: _resetDice,
 63            child: const Text('Reset'),
 64          ),
 65        ],
 66      ),
 67    );
 68  }
 69
 70  void _rollDice() {
 71    setState(() {
 72      _dice = r.nextInt(6) + 1;
 73    });
 74
 75    ScaffoldMessenger.of(context).showSnackBar(
 76      const SnackBar(
 77        content: Text('Rolling...'),
 78        duration: Duration(milliseconds: 300),
 79      )
 80    );
 81  }
 82
 83  void _countUp() {
 84    setState(() {
 85      _dice = _dice < 6 ? _dice + 1 : _dice;
 86    });
 87  }
 88
 89  void _resetDice() {
 90    setState(() {
 91      _dice = 0;
 92    });
 93  }
 94
 95  String determineImage(int value) {
 96    if (value == 0) {
 97      return 'assets/empty_dice.png';
 98    }
 99    return 'assets/dice_$value.png';
100  }
101}
In a matter of simple 10 steps, we created:
- A beautiful application, courtesy of Material You design language.
- An application guaranteed to run in 60 fps natively.
- An application which runs on Android, iOS, Linux, Windows, macOS, and the web.
- Likewise, an application ready to be deployed on any environment of your choice, if you are able to port the flutter engine there first.
Also, we’ve gone through mostly everything the development of a Flutter app involves, including widget refactoring, using custom widgets, bringing in assets, a bit of state management, some theming, and not to mention, using Hot Reload.
All from a single codebase.
What I showcased was a sliver of what Flutter could provide you in app development. If you are interested, visit the website and give it a spin, read the docs, go through the framework source code, read some more articles and watch tutorial videos. If this article didn’t convince you, those would definitely will.
Best of luck for your future Flutter endeavours!